In the first article of this series related to the IIS SMTP service, we covered the installation process, the mostly used outgoing connection settings and the basic functionality tests to check its operation status. However, we didn’t touch any part related to the incoming connection and security settings.
This article will cover that tab related to the access control and incoming security parameters. Let’s begin.
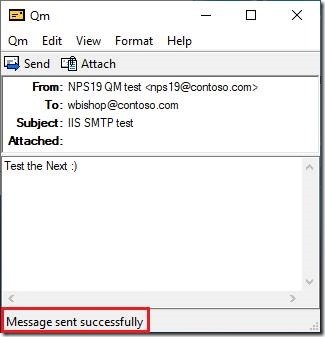
If you already tried to use this newly configured server to send any email, you probably faced the error. Although your e-mail client (I used my favourite lightweight portable freeware SMTP client named QM) can connect to it, actually it will be blocked to send any email.
All those incoming access parameters can be configured on the second important tab inside the SMTP server properties. To access this tab, you need to:
- open the Administrative Tools group
- locate the Internet Information Services (IIS) 6.0 Manager
- (the main windows of the IIS 6.0 Manager GUI will open)
- click on the > sign before the server name and expand the whole branch
- right click on the SMTP Virtual Server #1 and choose the option named Properties
The new dialogue window will pop up.
The access tab
The second useful tab is the second one in row, named Access. This tab controls the four inbound security settings:
- Authentication
- TLS encryption
- Allowed connection
- Allowed relays
I haven’t got a need to configure all those options in my specific case, yet I learned about all of them. Let me give you a brief rundown of the available options.
We usually don’t need to setup each of those options. Actually, we will probably need to configure only one or two of them. There is no a “silver bullet” or an one-size-fits-all solution here. The choice depends on the particular situation and the overall security risk.
Let’s get familiar here with every option.
Access Control
The option named Access Control is used to specify the access method to your server. Usually we will not change it from the default option – Anonymous access, especially if the sending host is the same machine.
However, it’s possible to change it and we can choose between any combination of the following mechanisms:
- Anonymous authentication (default option)
- Basic authentication
- Integrated Windows Secure authentication (SPA)
In case that you choose the Basic authentication, you will see the warning dialog:
The Basic authentication mechanism actually used the Base64 encoded (scrambled) text, which can be easy reverted to the clear text. Here’s the relevant part of the client side log:
Now, when we enable the Basic authentication option, we should specify the authentication domain, too. The authentication domain can be your Windows AD domain or just the local machine!
I entered here the name of the AD domain (contoso.com), yet I still don’t have any account there. When I tried to send the test email, I received the expected error:
When I added (defined) the user on the domain, the email was sent successfully.
In case that I want to use the local machine, I should enter here the name of my machine, in this case NPS19.contoso.com. After that, the whole authentication process will be performed against the local user database.
It’s also highly recommended to use the TLS option here, yet we will discuss it in details the next part.
When you make all changes that you need, just click on the button named [ OK ] to close this dialog.
TLS encryption
In case that you want to use the TLS encryption to protect your communication, you will need the valid server certificate in the machine store. This is the highly recommended configuration for any publicly accessible server.
Bear in mind that you will need such certificate only for the incoming TLS connection. For the outgoing TLS connection, this machine will act as a client in the same way as any other email client do (like that browser on your device while reading this article) and you don’t need the server certificate. In such case, you will usually need to have only the valid Root CA certificate.
To enable the incoming TLS encryption, we only need to tick that checkbox named Require TLS encryption, click on the [ OK ] button and restart the service.
First of all, the word of caution. I made a few tests and IIS SMTP service is a bit rigid and it can act strange indeed. The SMTP (email) servers are usually configured to use the optional TLS encryption, if such option is enabled on the port 25. However, IIS SMTP will force the required TLS encryption. That means that other side must support the TLS encryption, the same protocol version and the same cipher or the communication will fail beyond recover.
When we open the log, it will explain this situation:
The QM client is the “quick and dirty” SMTP client that support most common SMTP options except the TLS support. Now, when it connect to our IIS SMTP server, it will perform the same message exchange protocol as any other host.
For any flexible email server that isn’t any issue as they will fall-back, yet here we must execute the STARTTLS command. As our test client cannot run such command, it will be rejected.
Having that on our mind, we should decide do we really need the incoming TLS support and if so, could our clients support it. The same goes with the outgoing TLS support, yet we can a bit more flexible in that case.
For those readers which want to learn more about those SMTP codes that appeared in this example, please check this article.
Connection control
The Connection control field can restrict the number of the hosts that can connect to your SMTP server. This is also critical security control for the public server, yet you can use it also in the LAN. In most cases, you will limit access only to your Web app server by its all IP addresses, including 127.0.0.1.
The new pop-up window will appear when you click on the button named [ Connection… ]. In the beginning it will look like this
As you can see, all machines can connect because the deny list is empty. If we now click on [ Add… ], the new dialog will pop-up and we can add the single host, the range or the entire domain in the list. Let’s say that we want to add the local host (i.e. the IP address 127.0.0.1).
Just click on the button [ OK ] and this IP is now on the black list of our server.
We can use this mechanism in case that we want to block the limited set of the remote machines. In most cases, we will use the other option named Only the list below and we can build the white list of all machines which can access and use our server.
The process is the same, yet you need to select the upper option and then to click on the button [ Add… ].
In case that your server should be used to relay only the emails from the local server, you can limit the network access only the local machine (the IP address 127.0.0.1 and all other IP addresses assign to the local machine).
Relay Restrictions
The Relay restrictions field is used to control which host can send the email to any other email server in the World, using this specific server as its relay. You don’t want to open your server to be the open relay. Therefore, allow only the server’s own IP addresses (including 127.0.0.1) here.
Bear in mind that the Relay restriction settings are very restrictive by default – no one can relay. If you can’t send the email, check those settings first!
In the email client’s log we can find the explanation:
Bear in mind that we’re not using here any authentication and the Anonymous authentication actually isn’t authentication at all. Let’s add the localhost as the permitted host for relaying operations:
When we tried again to send the same message, it was successful and also the log stated:
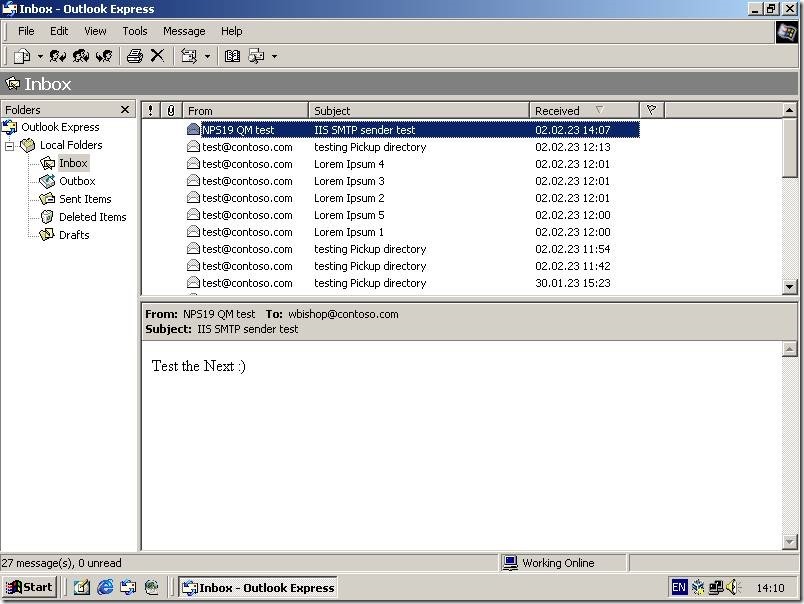
And the final recipient received the message, too:
How to use all those options?
As I already mentioned, there is no one unique solution for everyone. Everything depends on the context. If you need to send (forward, relay) messages from the localhost, then you can use only the Connection control and the Relay control. There is usually no need for the authentication or the TLS protection, while only services located this one specific host can communicate between themselves.
In scenario where you want to use this service as the relayer for other servers in the network, you can limit both connectivity and relay control on such local network range. Additionally, the authentication control may be used if the sending applications can support it.
Whenever we have any credentials exchange over the network we should consider encryption. Yes, such traffic should be encrypted. Of course, you can be relaxed in your local network and maybe avoid encryption, yet any such traffic over the open Internet connection should be avoided at any cost.
Bear in mind that the IIS SMTP service can work either in the unencrypted mode or in the strict (required) TLS mode. In case that your email client (any application which will send the email) cannot use TLS, the whole communication will fail. In case like that one, we will need to find other solution to protect our communications and information inside them.
You need to carefully balance between needed functionalities and requested security and find the best path for your own case.
Stay tuned.


[…] far, we covered the general installation flow and the incoming security settings related to the IIS SMTP service. Today’s article will cover the outgoing security settings, […]
LikeLike
[…] two familiar user accounts named user1 and mailtest, created for other posts related to the IIS SMTP service and the net user […]
LikeLike
[…] In my example, I used again the same server which I used for the IIS SMTP service presentation. As you can see, there is one local user named mailtest, the same one I mentioned in the post about the IIS SMTP service security. […]
LikeLike
[…] to change any security-related parameter, you can do that too. I will cover those settings in the separate article, focusing only on many security-related features of the SMTP […]
LikeLike