You need to add a new user on your Windows server (or maybe on the domain). How would you accomplished such task?
Sure, you can fire up the GUI tool and add one user. What would you do when you need to add 2, 5, 10 or 100 users at once?
Although you can again use the GUI tools and add them one by one, the command line magic will finish the job significantly faster and without a mistake. Not to mention that you can easily automate such tasks.
Periodically, I have a need to add a few users (or accounts) on the servers that will be used for one specific application. As I already mentioned, it’s not a problem to add one user to one server once and then we will not repeat such action for months or even years.
However, the last time I had a need to add three identical users on four servers. Yes, I can do that manually, yet this is the call for the command line magic. I typed all commands in the notepad and then just executed such script on each server. In a split second I created all needed users on every server without any mistake.
The key for the success is the command net user. This command exists since forever. I already mentioned that command in my other post, where we checked the account’s expiration date. In this article, we will use it to create, update or delete the user account.
The beauty of this command is that you can use it on any member server or workstation, yet it can be used on the domain controllers too. Even better, you can execute such command on any machine in domain and make changes on the domain controller itself.
Listing of all existing accounts
To check all existing accounts on the local machine, type the command
net user
This one will return all local users/accounts.
In my example, I used again the same server which I used for the IIS SMTP service presentation. As you can see, there is one local user named mailtest, the same one I mentioned in the post about the IIS SMTP service security.
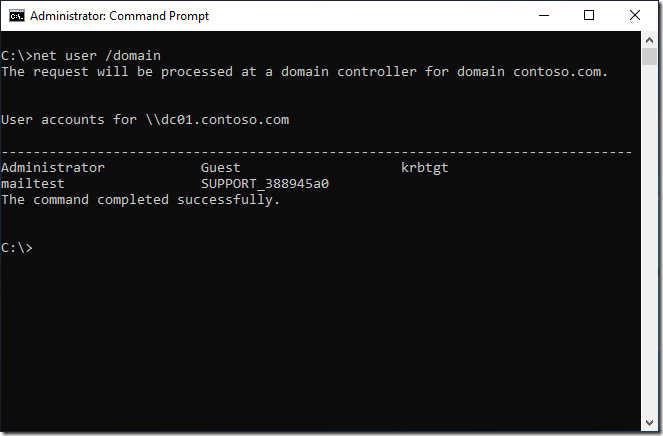
In case that I want to check all users on the domain, I will just add the option /domain, i.e.
net user /domain
And here’s the result:
We can see two differences here. The first one is that we’re informed that this request will be executed on the domain controller for our domain:
The request will be processed at a domain controller for domain contoso.com.
The second one is the name of the server. Instead of the local server (NPS19) we have the name of the domain controller which was contacted (DC01.contoso.com):
User accounts for \dc01.contoso.com
The rest of the output is the same.
Adding a new account
Suppose that we want to add a new local account named user1. The command will be:
net user user1 Password01 /add
That’s it! Our new account is created.
For the domain operations you need to add the /domain option.
In this example, I added the password directly from this command (Password01), yet you can opted to type it from the console input. This is usually required for security reasons.
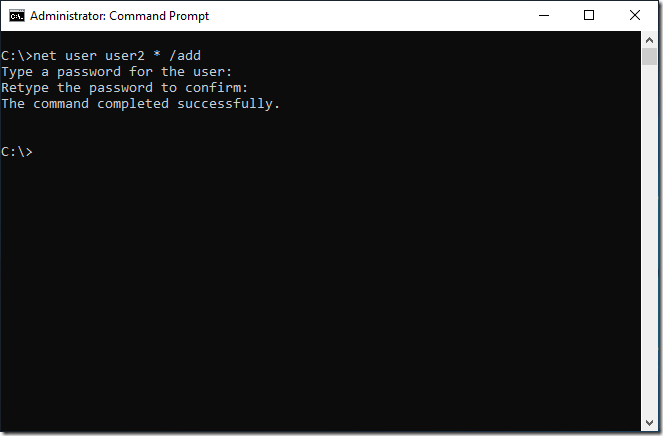
If you type * as the password, the command will prompt you to enter the password using the keyboard input. In that case, your input will be hidden on the screen.
Can you see that new user in the GUI? Absolutely!
As you can see, both users are here in the list.
Deleting an unneeded user
Now, we just discovered that we don’t need the user names user2. We will remove it from the local account database. The command will be
net user user2 /delete
If such username exists, it will be deleted. Otherwise, you will see the error message:
The user name could not be found.
Modifying existing account
We can specify a few more options either during the creation process or later. There are many options and you can see them all with the command
net help user
I will show you here a few configuration options I found most useful.
Adding the user’s full name
If you check our newly created account, you can see that we didn’t specify its full name. We can achieve that with the following command:
net user user1 /fullname:"Demo user"
Then I executed the command net user user1 to list its properties. As you can see, now we have the full name of this account.
That change will be visible in the GUI too.
Disabling an account
We may have a need to disable any specific account rather to delete it from the system. Such account will remain in the system, its SID will be still preserve and you can still see any permission related to it. The only difference is that such user cannot log in on this machine (or in the domain).
The command is very simple:
net user user1 /active:no
When I checked this account again, it is disabled. The property named Account active is changed to No.
Of course, you can enable such account with the command
net user user1 /active:yes
Adding comment for the account
The comment (or description) field is very useful as we can explain why we created each account in the system. Generally, it can be specify for every account, yet we will usually add comments for the service accounts or any other special accounts.
Let’s add the comment on our demo user:
net user user1 /comment:"For the article on MiViLiSNet"
As you can see, we successfully added the comment even when the account is in the disabled state.
When we check it in the GUI:
As you can see, all changes are visible here.
Limitations
The only one option which cannot be set using the command line is Password never expires. From the security standpoint, you should not use that option, except for a very small subset of the service accounts with as many restrictions as it’s possible.
As you can see, we can do the magic with this command. Even better, we can write the script that will parse input file and add all users listed in such file. In the other hand, this command also has its own limitations. Of course, there are other commands, like dsadd, or the power shell alternative.
We rarely have a need to only add users. Many times we also need to associate those users with groups. Yes, we can do that too, using the similar command. I will explain it in details in the dedicated post.
Stay tuned.


[…] my other post, I explained the command line method to add users on the local machine or on a domain. Defining […]
LikeLike