You should keep your Mikrotik device up-to-date, because it is exposed to the hostile world of Internet. You can manually perform that task using the System > Packages menu option. However, there’s another way to update all your routers.
You can use your own update server to update all routers under your control. Even better, the whole process can be automated, using the Power of scripting.
Let’s do it!
What do you need?
You need one MikroTik router with enough disk space to store those update packages and that’s all. You can use either any Routerboard (preferably with a SD card) or the x86/PC version.
On that router, you should create one account that will be used for this purpose. You can create the read-only account. In this test case, I made one account named test with the password test.
All client routers will connect to the port 8291 of this update device. Therefore, you need to open this port on that router, at least for your managed devices.
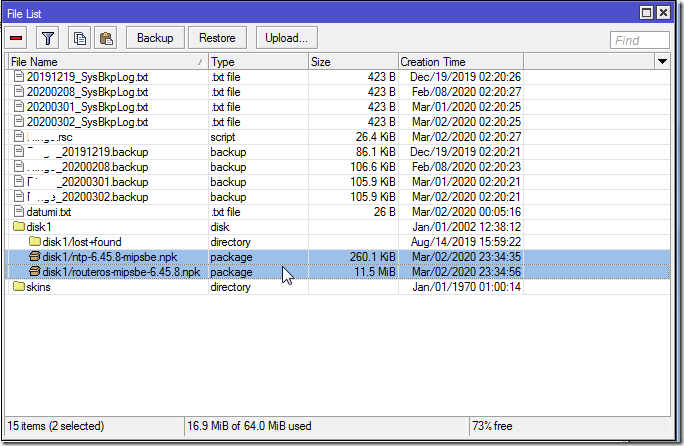
As you can see on this screenshot, I uploaded all related files on the external disk (in my case, this is the A1 class micro SD card). In my example, I added only the base package (routeros-mipsbe-6.45.8.npk) and the NTP package (ntp-6.45.8-mipsbe.npk).
Configuring my update client
I will show you how to perform this configuration from the GUI. It’s very simple. I opened WinBox and navigate to the menu named System > Auto Update.
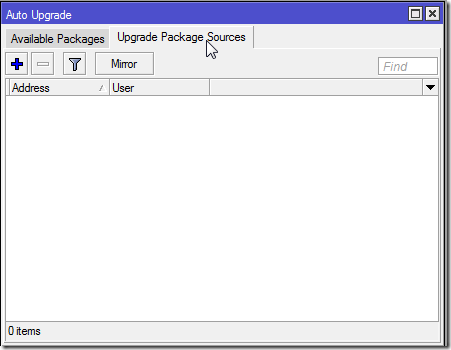
When I clicked on this option, the new dialog popped up.
I chose the tab named Update Package Sources. We can add here our internal update server.
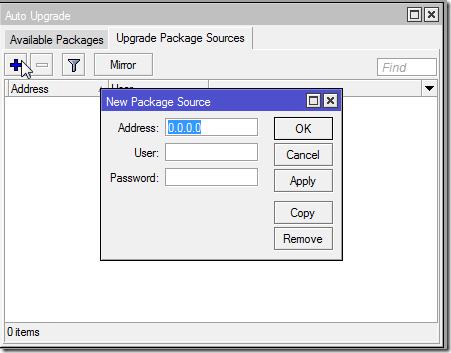
I clicked on the button [ + ] and one more dialog popped up. In this new dialog I entered all necessary parameters.
You will probably ask here – may I use FQDN instead of the IP address? The answer is yes, but MikroTik will resolve that FQDN to the IP address and write it here.
The username and password are those related to this update account (as I mentioned – test/test).
When I finished, I clicked on the button [ OK ]. This dialog closed. This new server appeared in the list.
We can repeat this process for every server we plan to use.
Checking for the update packages
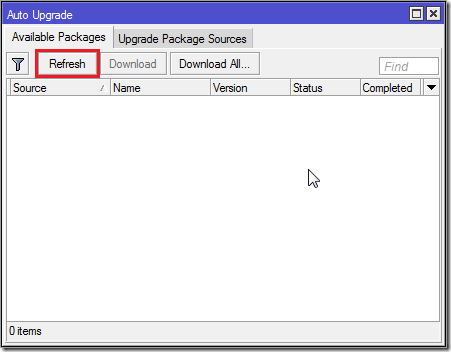
I don’t have any more servers and I changed the active tab to other named Available Packages.
On this new window, I clicked on the button named [ Refresh ]. That initiated the remote connection with my server. After a while, my router found all available packages.
In this case, I didn’t needed to download them, as they are already installed.
However, in the general case, if those packages are newer, we will download them on our router. This option will not automatically update a router. We need to restart it to finish this process.
Using the command line
As you already know, MikroTik has the powerful command line and scripting. Everything you can do using the WinBox, you can perform from the CLI. And even more!
You can do the same steps using the CLI with the follow commands:
[admin@MikroTik] > system upgrade upgrade-package-source add address=203.0.113.9 user=update
password: ********
[admin@MikroTik] > system upgrade refresh
[admin@MikroTik] > system upgrade download-all
In this example, we will use the server with IP address 203.0.113.9. To log in to this server, we will use the account named update with the password password (it’s masked with asterisks).
You can use those command to write the script that will run on schedule, for instance once per day.
You should utilise the power of scripting to automate every possible administrative task and make your life easier. When the number of routers start to grow, you will spend more and more time on the basic tasks. Eventually, you will be bored and that leads to errors. And you should not allow to yourself such moment.
Stay tuned.


Hi, thank you for posting this one. I am struggling to get this working on current long term routeros releases. Any hints whether something might have changed since you posted this?
LikeLike
Hi, you’re welcome!
I always like to share my experience with others. I like to hear that someone else found it useful.
Anyway, this is a great question! I was curious and I tried it with RouterOS 6.48.6 LTS and it seems that that doesn’t work. I can see a success connection between the client and the server, but no files in the list.
I’m not sure what happened here, maybe it’s a bug.
Cheers,
Srdjan
LikeLike
just found that mikrotik refers to it here
https://wiki.mikrotik.com/wiki/Manual:Upgrading_RouterOS#RouterOS_massive_auto-upgrade
under “Older options Until v6.31: ”
I think it’s not supported anymore.
LikeLike
I found the same reference and it’s not so clear. Obviously, there’s the same option and it try to do something, but it failed to complete the process.
Anyway, I’m using Dude for massive upgrades and that option is fine.
LikeLike
Hi,
it seems to be the same on ROS 7.1.x. Is see the connection to the host router, but no files are listed.
can you confim this ?
Thx.
Cheers,
Steiny
LikeLike
Hi,
I didn’t try ROS 7 yet.
Nonetheless, I’m curious about some setup. I will try something and update article according my tests.
LikeLike
[…] to the scenario with your local update source point, if your routers are independent to each other and on the separate Internet links, you will […]
LikeLike