I keep looking for ways to improve my virtual lab and made it as realistic as possible. Although using Mikrotik routers is enough to build a large infrastructure, it’s not completely accurate with the real world experience – Mikrotik routers always work.
In the real world, we often need to connect a Mikrotik router either directly to other types of devices or even behind an exotic grandma’s home appliance. On the other hand, this is the lab and I don’t need any fancy features in such software. I want to save every megabyte of RAM or disk space on my laptop.
My search was fruitful and I found the perfect candidate – FloppyFW. This is the fully functional Linux-based router/firewall that can fit on a single 1.44” floppy disk.
A small and powerful solution
You can find detailed information on the download page. Here is a short overview – you need as a minimum 386-based PC with at least 12 MB RAM and a single floppy drive. You don’t need a hard disk. Perfect for my lab.
Be careful about its usability. This software is built on the old kernel 2.4.37.11 and it may contain a serious security flaws. Therefore, I will not recommend that you use it in a production environment.
The place for my new router will be in the MegaISP network as a CPE device. In particular, it will replace the existing “ADSL CPE router” for Trange Frange Comp. I used the older release of Mikrotik RouterOS x86 software and I want to simulate connecting through a different type of equipment.
The ADSL/PPPoE connection type has been widely used for years. We have the already prepared a disk image for this scenario. However, there is also the general image that can be configured for any scenario.
The image is in the form of virtual floppy disk and can be directly used in VirtualBox. In case that you need to edit it, you may use the WinImage tool.
Building a VM
I built a new VM for the FloppyFW router. The basic process was a very simple. Later I had to configure a few settings.
As you can see on the Web page, the version 3.0.15 uses kernel 2.4.37.11. Additionally, this software is 32-bit. Therefore, I chose Linux 2.4 (32-bit), with 16 GB RAM and without hard disk.
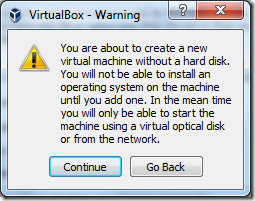
If you omit a hard disk, VirtualBox will pop-up the warning message:
Just click on the [ Continue ] button.
We have the new VM, but we need a few touches. I edited settings to make it fit for this specific software. The changes I made:
- Add floppy controller
- Insert the virtual floppy image
- Remove all other storage controller types
- Add (enable) the second NIC
- Add (enable) the COM1 port
At the end, my VM had the settings presented on the screenshot:
A few more remarks. Although VirtualBox warns if the Processor Execution Cap is set under 40%, this is the software for a vintage PC. 10% of the CPU time of i5 processor may be more than the full time of those old CPUs.
The software expecting COM port, so make it happy and enable the COM1 port. As you can see on the download page, the AMD PCNet32 adapter, used as default in VirtualBox, is well supported.
This is the router and it needs two NICs, except when we using a dial-up or ISDN connections. In such case you need only one NIC.
As I mentioned before, you can find a few images on the download page. I downloaded them all and chose the one named floppyfw-3.0.15-pppoe.img. This one will best fit my needs.
You can also see two folders on that page. One is named packages and second modules. They contain additional packages, like DropBear SSH server, that can extend capabilities of the base package. I downloaded them too. Maybe I will need them later for further projects.
The first start
It’s time to run my router. I started it and it needed maybe a minute to display the login prompt.
Default login is root and no password. Generally speaking, I don’t need passwords in my closed virtual lab. However, depending on your environment, you may need to configure the root password and limit access.
Now I have the template for my new “ADSL” router. However, to achieve the full potential of this solution, I need to configure it. We can configure a lot of parameters, such as router name, root password, PPPoE credentials, LAN DHCP settings, etc.
The process is easy. Unfortunately, most of the configuration documents for this software are either old or vanished. Therefore, I will explain this process in the next article.
Stay tuned.


[…] successfully built a new VM that will serve as the ADSL router in my virtual lab. As the next step, I needed to configure it with specific parameters for my […]
LikeLike